一、引言
1.1 亚马逊新品榜的重要性
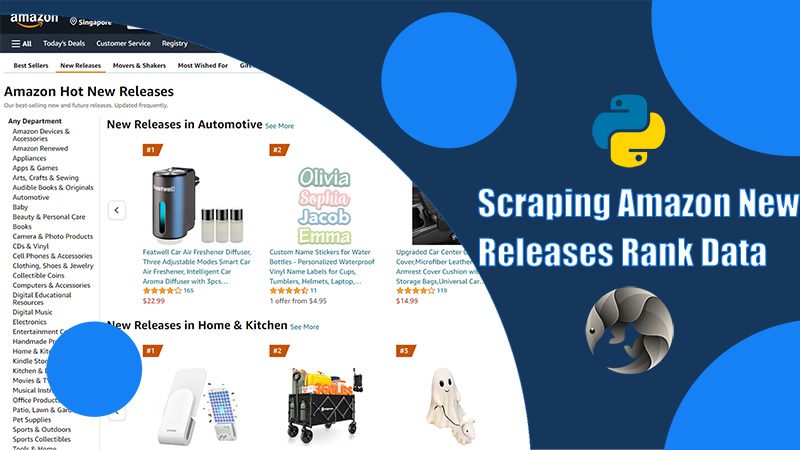
亚马逊是全球最大的电商平台之一,亚马逊新品榜展示了最新上架并受欢迎的产品。对于电商卖家和市场分析师来说,了解这些新品榜单可以帮助他们捕捉市场趋势,了解消费者喜好,从而优化产品策略和营销方案。
1.2 采集亚马逊数据的价值
通过采集亚马逊的数据,用户可以进行多维度的市场分析。例如,分析商品的价格趋势、用户评价、销量排名等,能够为企业的产品开发和市场推广提供数据支持。此外,电商卖家还可以通过竞争对手分析,调整自己的运营策略,提高竞争力。
二、采集亚马逊热卖榜数据的困难
2.1 动态加载内容
亚马逊的网页内容通常是动态加载的,使用传统的静态爬虫方法无法直接获取全部数据。这就需要使用能够处理动态内容加载的工具,例如Selenium或Playwright。
2.2 反爬虫机制
亚马逊具有强大的反爬虫机制,会检测并阻止频繁且异常的请求。这包括检测用户行为模式、使用CAPTCHA等手段。绕过这些机制需要高级的技术手段,如IP代理池和请求频率控制。
2.3 IP限制和验证码
亚马逊对来自相同IP地址的频繁请求会进行限制,并可能触发验证码验证。这要求爬虫程序具有处理IP限制和验证码的能力,确保数据采集的连续性和稳定性。
2.4 数据结构复杂
亚马逊页面的数据结构复杂,不同页面之间的结构可能存在差异。这需要爬虫程序具有较强的灵活性和适应性,能够根据不同页面结构准确提取所需数据。
三、Python爬虫环境准备
3.1 安装Python和必要的库
首先,我们需要安装Python和相关的库。以下是安装Python和一些常用库的步骤:
# 安装Python
sudo apt update
sudo apt install python3
sudo apt install python3-pip

# 安装必要的库
pip3 install scrapy selenium requests bs4
3.2 选择合适的爬虫框架(如Scrapy)
Scrapy是一个强大且灵活的爬虫框架,适合处理大规模数据采集任务。我们可以使用以下命令安装Scrapy:
bash复制代码pip3 install scrapy
3.3 设置虚拟环境
为了保证项目的依赖管理,我们建议使用虚拟环境:
# 安装virtualenv
pip3 install virtualenv

# 创建虚拟环境
virtualenv venv

# 激活虚拟环境
source venv/bin/activate
四、设计爬虫架构
4.1 定义目标URL和数据结构
首先,我们需要确定目标URL和需要提取的数据结构。例如,我们需要从亚马逊新品榜提取商品名称、价格、评分等信息。
4.2 创建Spider类
在Scrapy中,我们通过创建Spider类来定义爬虫的行为。以下是一个简单的Spider类示例:
import scrapy

class AmazonSpider(scrapy.Spider):
    name = "amazon"
    start_urls = [
        'https://www.amazon.com/s?i=new-releases',
    ]

    def parse(self, response):
        for product in response.css('div.s-main-slot div.s-result-item'):
            yield {
                'name': product.css('span.a-text-normal::text').get(),
                'price': product.css('span.a-price-whole::text').get(),
                'rating': product.css('span.a-icon-alt::text').get(),
            }
4.3 实现数据解析函数
数据解析函数用于从响应中提取所需数据。在上面的示例中,我们使用CSS选择器来定位和提取商品信息。
五、处理动态加载内容
5.1 使用Selenium模拟浏览器行为
Selenium可以模拟用户操作,加载动态内容。以下是使用Selenium加载亚马逊页面的示例:
from selenium import webdriver
from selenium.webdriver.chrome.service import Service
from selenium.webdriver.common.by import By
from selenium.webdriver.support.ui import WebDriverWait
from selenium.webdriver.support import expected_conditions as EC

service = Service('/path/to/chromedriver')
options = webdriver.ChromeOptions()
options.headless = True
driver = webdriver.Chrome(service=service, options=options)

driver.get('https://www.amazon.com/s?i=new-releases')
5.2 等待页面加载完成
使用Selenium时,我们需要等待页面加载完成后再提取数据:
wait = WebDriverWait(driver, 10)
products = wait.until(EC.presence_of_all_elements_located((By.CSS_SELECTOR, 'div.s-result-item')))
5.3 提取JavaScript渲染后的数据
一旦页面加载完成,我们可以使用Selenium提取JavaScript渲染后的数据:
for product in products:
    name = product.find_element(By.CSS_SELECTOR, 'span.a-text-normal').text
    price = product.find_element(By.CSS_SELECTOR, 'span.a-price-whole').text
    rating = product.find_element(By.CSS_SELECTOR, 'span.a-icon-alt').text
    print(f'Name: {name}, Price: {price}, Rating: {rating}')
六、绕过反爬虫机制
6.1 设置User-Agent
设置User-Agent可以模拟真实用户请求,绕过部分反爬虫检测:
headers = {
    'User-Agent': 'Mozilla/5.0 (Windows NT 10.0; Win64; x64) AppleWebKit/537.36 (KHTML, like Gecko) Chrome/91.0.4472.124 Safari/537.36'
}

response = requests.get('https://www.amazon.com/s?i=new-releases', headers=headers)
6.2 实现IP代理池
使用IP代理池可以避免IP被封禁:
import requests

proxies = {
    'http': 'http://your_proxy_ip:port',
    'https': 'https://your_proxy_ip:port'
}

response = requests.get('https://www.amazon.com/s?i=new-releases', headers=headers, proxies=proxies)
6.3 控制请求频率
控制请求频率可以降低被检测到的风险:
import time

for url in urls:
    response = requests.get(url, headers=headers)
    # 处理响应数据
    time.sleep(2)  # 延迟2秒
七、处理验证码和登录
7.1 识别验证码(OCR技术)
我们可以使用OCR技术来识别验证码,例如使用Tesseract:
from PIL import Image
import pytesseract

captcha_image = Image.open('captcha.png')
captcha_text = pytesseract.image_to_string(captcha_image)
7.2 模拟登录过程
使用Selenium可以模拟登录过程:
driver.get('https://www.amazon.com/ap/signin')

username = driver.find_element(By.ID, 'ap_email')
username.send_keys('[email protected]')

password = driver.find_element(By.ID, 'ap_password')
password.send_keys('your_password')

login_button = driver.find_element(By.ID, 'signInSubmit')
login_button.click()
7.3 维护会话状态
使用请求库的Session对象可以维护会话状态:
import requests

session = requests.Session()
session.post('https://www.amazon.com/ap/signin', data={'email': '[email protected]', 'password': 'your_password'})
response = session.get('https://www.amazon.com/s?i=new-releases')
八、数据提取和清洗
8.1 使用XPath或CSS选择器定位元素
使用XPath或CSS选择器可以准确定位页面元素:
from lxml import html

tree = html.fromstring(response.content)
names = tree.xpath('//span[@class="a-text-normal"]/text()')
8.2 提取商品信息(名称、价格、评分等)
提取商品信息的示例代码:
for product in products:
    name = product.find_element(By.CSS_SELECTOR, 'span.a-text-normal').text
    price = product.find_element(By.CSS_SELECTOR, 'span.a-price-whole').text
    rating = product.find_element(By.CSS_SELECTOR, 'span.a-icon-alt').text
8.3 数据清洗和格式化
清洗和格式化数据,使其便于存储和分析:
cleaned_data = []
for product in raw_data:
    name = product['name'].strip()
    price = float(product['price'].replace(',', ''))
    rating = float(product['rating'].split()[0])
    cleaned_data.append({'name': name, 'price': price, 'rating': rating})
九、数据存储
9.1 选择合适的数据库(如MongoDB)
MongoDB是一种适合存储爬虫数据的NoSQL数据库:
# 安装MongoDB
sudo apt install -y mongodb

# 启动MongoDB
sudo service mongodb start
9.2 设计数据模型
设计数据模型,使数据结构清晰:
import pymongo

client = pymongo.MongoClient("mongodb://localhost:27017/")
db = client["amazon"]
collection = db["new_releases"]

product = {
    'name': 'Sample Product',
    'price': 19.99,
    'rating': 4.5
}

collection.insert_one(product)
9.3 实现数据持久化
将提取的数据持久化存储到MongoDB:
for product in cleaned_data:
    collection.insert_one(product)
十、爬虫优化
10.1 多线程和异步处理
使用多线程或异步处理可以提高爬虫效率:
import threading

def fetch_data(url):
    response = requests.get(url, headers=headers)
    # 处理响应数据

threads = []
for url in urls:
    t = threading.Thread(target=fetch_data, args=(url,))
    threads.append(t)
    t.start()

for t in threads:
    t.join()
10.2 分布式爬虫
分布式爬虫可以进一步提升数据采集的规模和速度,使用Scrapy-Redis等工具可以实现分布式爬虫:
# 安装Scrapy-Redis
pip3 install scrapy-redis

# 在settings.py中配置Scrapy-Redis
DUPEFILTER_CLASS = "scrapy_redis.dupefilter.RFPDupeFilter"
SCHEDULER = "scrapy_redis.scheduler.Scheduler"
SCHEDULER_PERSIST = True
REDIS_URL = 'redis://localhost:6379'
10.3 增量式爬取
增量式爬取可以避免重复数据采集,节省资源:
last_crawled_time = get_last_crawled_time()
for product in new_products:
    if product['date'] > last_crawled_time:
        collection.insert_one(product)
十一、代码实现示例
11.1 Spider类代码
以下是一个完整的Spider类示例:
import scrapy
from myproject.items import ProductItem

class AmazonSpider(scrapy.Spider):
    name = "amazon"
    start_urls = ['https://www.amazon.com/s?i=new-releases']

    def parse(self, response):
        for product in response.css('div.s-main-slot div.s-result-item'):
            item = ProductItem()
            item['name'] = product.css('span.a-text-normal::text').get()
            item['price'] = product.css('span.a-price-whole::text').get()
            item['rating'] = product.css('span.a-icon-alt::text').get()
            yield item
11.2 数据解析函数
数据解析函数示例:
def parse_product(response):
    name = response.css('span.a-text-normal::text').get()
    price = response.css('span.a-price-whole::text').get()
    rating = response.css('span.a-icon-alt::text').get()
    return {'name': name, 'price': price, 'rating': rating}
11.3 反爬虫处理代码
反爬虫处理代码示例:
headers = {
    'User-Agent': 'Mozilla/5.0 (Windows NT 10.0; Win64; x64) AppleWebKit/537.36 (KHTML, like Gecko) Chrome/91.0.4472.124 Safari/537.36'
}

proxies = {
    'http': 'http://your_proxy_ip:port',
    'https': 'https://your_proxy_ip:port'
}

response = requests.get('https://www.amazon.com/s?i=new-releases', headers=headers, proxies=proxies)
11.4 数据存储代码
数据存储代码示例:
import pymongo

client = pymongo.MongoClient("mongodb://localhost:27017/")
db = client["amazon"]
collection = db["new_releases"]

for product in cleaned_data:
    collection.insert_one(product)
十二、注意事项和最佳实践
12.1 遵守robots.txt规则
爬虫应遵守目标网站的robots.txt规则,避免对服务器造成过大压力:
ROBOTSTXT_OBEY = True
12.2 错误处理和日志记录
良好的错误处理和日志记录可以提高爬虫的稳定性和可维护性:
import logging

logging.basicConfig(filename='scrapy.log', level=logging.INFO)
try:
    response = requests.get('https://www.amazon.com/s?i=new-releases', headers=headers, proxies=proxies)
except requests.exceptions.RequestException as e:
    logging.error(f"Request failed: {e}")
12.3 定期维护和更新爬虫
定期维护和更新爬虫,确保其适应网站结构和反爬虫机制的变化。
十三、采集亚马逊数据的现状和难点总结
13.1 技术挑战
采集亚马逊数据面临诸多技术挑战,如动态内容加载、反爬虫机制、IP限制和验证码等。这些问题需要综合运用多种技术手段来解决。
13.2 法律和道德考虑
采集数据时需遵守相关法律法规,并尊重目标网站的使用条款。违法或不道德的数据采集行为可能带来法律风险和道德争议。
13.3 数据质量和实时性问题
数据质量和实时性是数据采集的重要指标。采集过程中应尽量确保数据的准确性和及时性,避免过时或错误的数据影响分析结果。
十四、更好的选择: Pangolin Scrape API
14.1 Scrape API简介
Pangolin Scrape API是一种专业的数据采集服务,提供高效、稳定的数据采集解决方案,支持多种目标网站和数据类型。
14.2 主要特点和优势
Pangolin Scrape API具有以下特点和优势:
- 高效稳定:基于分布式架构,能够处理大规模数据采集任务,确保数据采集的效率和稳定性。
- 简便易用:提供简单易用的API接口,无需复杂的配置和编程,用户可以快速集成和使用。
- 实时更新:支持实时数据采集和更新,确保数据的及时性和准确性。
- 安全可靠:提供多层次的安全防护措施,确保数据采集的合法性和安全性。
14.3 适用场景
Pangolin Scrape API适用于以下场景:
- 市场分析:采集电商平台的商品数据,进行市场趋势分析和竞争对手研究。
- 数据挖掘:获取各类网站的数据,进行数据挖掘和商业智能分析。
- 学术研究:采集研究所需的数据,支持学术研究和论文写作。
十五、结语
15.1 Python爬虫的局限性
尽管Python爬虫在数据采集方面具有强大的功能,但在处理复杂动态内容、绕过反爬虫机制和维护会话状态等方面仍然存在一定局限性。
15.2 选择合适的数据采集方式的重要性
根据具体需求选择合适的数据采集方式非常重要。对于复杂的采集任务,使用专业的数据采集服务(如Pangolin Scrape API)可能是更好的选择。无论选择哪种方式,都应注重数据质量、及时性和合法性,确保数据采集的效果和安全性。


